
I’ve said it before, and I’ll say it a million times more. Crunchy Betty is blessed with the best readers ever to grace the earth. Not a day goes by that I don’t receive a sweet, thankful email that melts my heart.
And you guys support and help each other in ways that make me proud to be a part of the human race. Let’s be honest: Not many places like that exist on the internet. We’re pretty drama-free. This is good news. (TAKE THAT AND SHOVE IT.) (Just kidding.)
But recently Stephanie sent me a link to this blog post titled Why Your Readers Hate it When You Make Money. And number 9. Oh, number 9 really hit home. It was: “Because most stuff in our society is mass-produced, people tend to undervalue other people’s time.” (Not that I think any of you don’t want me to make money, but just the exhausting stuff that goes into writing a DIY blog tutorial.)
And you want to know, don’t you? You really want to know what all goes into writing DIY blog posts, and this might explain why sometimes I feel like I’m a little bit too crazy tired to respond to emails and questions on a weekly daily basis. Let me take you into the world of DIY tutorials for a moment. I promise to return you to sanity when we’re done.
Step 1: Inspiration and Research
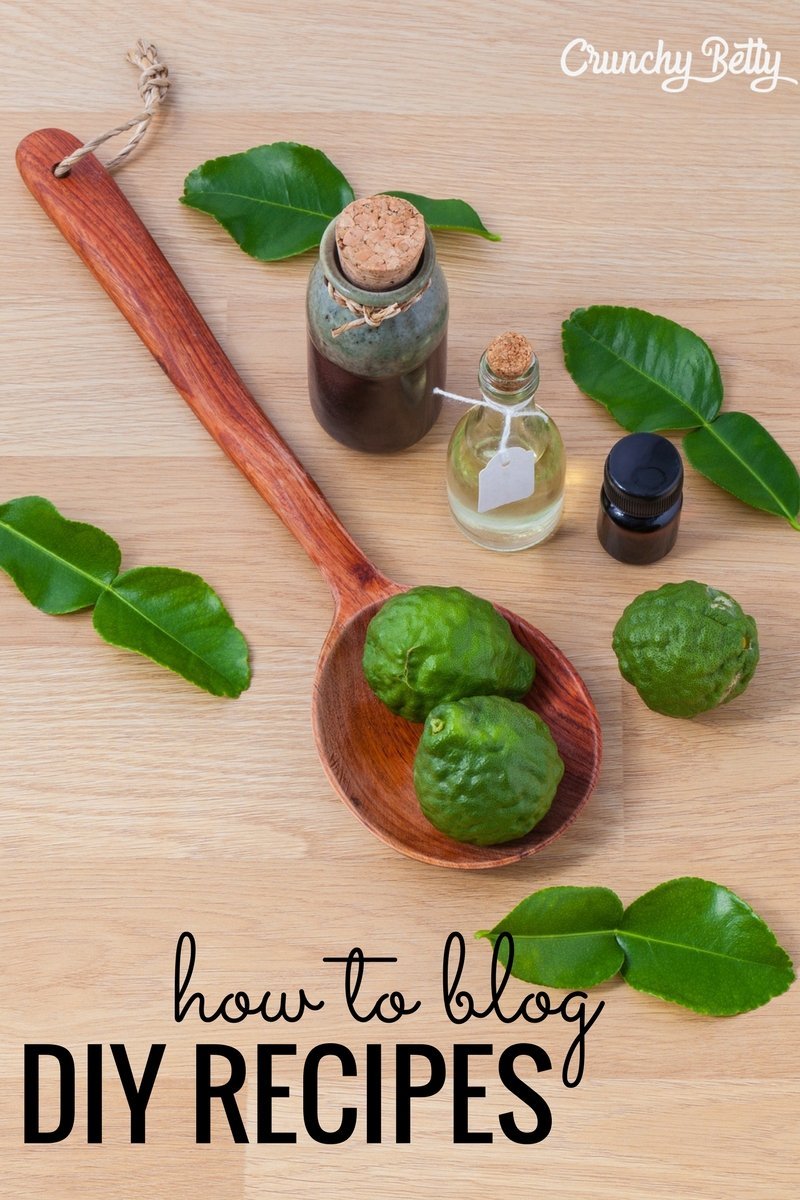
On any given night, this is what my bedroom looks like, although it’s usually covered in two stinky cats, too. They were camera shy tonight. Feeling a bit “bloated” after a can of turkey giblets and gravy.
Almost every evening, from the hours of about 7-9 p.m., you’ll find me here covered in books, reading blogs, and perusing Pinterest – looking for ideas, knowledge, and inspiration.
Now, not all inspiration comes from these places. Sometimes it comes from stuff I’m about to put down my garbage disposal. But even when I have an idea that doesn’t come from a book or the internet, I’ll be sitting here researching more.
Because it’s important to me to flesh out all ideas and figure out if there are easier and better ways we can make a recipe or utilize a home remedy. So I make lists. I research. And then I make more lists with more research.
Funny story. I actually made a list for this blog post about blog posts using pictures from another blog post. It’s like Inception, only with blogs. BLOGCEPTION.
After I’ve finalized an idea in my head, it’s not even decided yet.
Total time: 30 minutes to 3 hours per how-to post.
Step 2: Inventory and Shopping
Now that I have a general idea and lists about lists, hopefully one of which contains an ingredient list, I head over to the place I like to call my “Crunchy Corner.”

I’ll take my list, which I don’t usually tape up – I just did that to illustrate my point. Because if I hadn’t shown you a list, you probably wouldn’t believe that they exist. Lists are elusive and mostly imaginary, like unicorns.
ANYWAY, I take my list and go through my Crunchy Corner, where all good ingredients live, and see if I have everything I need. If not, then I go shopping.
While I’m at the store – or on my favorite natural ingredients websites – I’ll often pick up a bar of dark chocolate with sea salt, which I eat on my bed. This has nothing to do with writing posts. but you needed to know that. Since I showed you my bed.
Total time: 30 minutes to 1 hour.
Step 3: Testing the Idea
Unless I’ve already made what I’m going to blog, or I have a 99% confidence level that the idea will work, I’ll test it first.
This is where I work out the kinks and do most of my swearing and spilling. This involves laying everything I think I could possibly use out on the counter and choosing what makes the most sense as the test goes along.

Some days, the test goes swimmingly and I kick myself in the rear for not having taken pictures as I went along. But other days, it’s a disaster and I have to scrap the whole idea. Those are sad days. Meh.
But after I’ve run a test and it’s gone really, really well, I then clean up the kitchen for a second time. And it will not be the last. Oh no. It is never the last.
(When they say there are only two sure things in life, death and taxes, I get really angry that they also don’t say “and cleaning the kitchen.”)
Total time spent: 30 minutes to 2 hours.
Step 4: Making the “Thing” and Taking Pictures as You Go
Once I’m 100% sure I want to share the idea or recipe, it’s time to do the official take of the whole process. This is what you see in all the pictures throughout the how-to blog posts.
Instead of a picture of this whole process, let me give you the steps it goes in:
- Set everything out on the counter.
- Take 20 pictures.
- Move everything slightly and take 10 more pictures.
- Do the first step.
- Take 30 pictures, moving the stuff around constantly to find the right light.
- Do the next step while taking 25 pictures, moving stuff around constantly to find the right light.
- Say “DADGUM IT” after realizing that the time spent taking pictures is making everything harden or dry or set up before I can move to the next step.
- Consider starting over.
- Take 25 pictures again, after melting/starting over/or just barreling through.
- Take 5 pictures and then realize the camera was on the wrong setting and everything looks blue (and then be grateful for Photoshop).
- Repeat steps 2-10.
At this point, I typically have a decent final product.
And now it’s time to showcase the final product in a way that will really show off what this particular how-to result is about. I’m already tired by this point, so I’m probably drinking coffee. By “coffee,” I mean “A WHOLE LOT OF FREAKING COFFEE.”
Oh. And then I clean up the kitchen. Because, after this step, here’s what I have to deal with:

Total time spent: 1 – 3 hours.
Step 5: The Final Results Photo Shoot
This is the step I think y’all will really get into. I’m going to show you a definite behind-the-scenes look at what my setup is like.
In this step, you will learn: A) That I am as far from a professional photographer as a dog is from being a limo driver. B) My favorite tip for photographing objects when you’ve run out of natural daylight. B) Just how small and cozy my house really is.
So. Now that I have a finished product, I spend a lot of time contemplating different ways I can showcase it. Usually it involves bringing out either giant art paper (which I bought last year at Hobby Lobby and has come in VERY handy), an old piece of canvas, or various fabrics and other household things I have lying around.
I also yank out the cheapo lamp we have in the second bedroom and pop a light diffuser (that’s actually supposed to attach to a camera flash). Here’s one before and after pic for you:

Photography Cheater Pro tip: When you have a small object and have run out of any good natural daylight in which to photograph it, place it on a small background and then put everything on your (turned off) stove. Turn on the stove light and diffuse it with a coffee filter (just tape it up there if you need to). PERFECT overhead lighting!
Here’s another “setup” and “result picture for you:

After 30-100 of these types of pictures, depending on how well the coffee is working, I then sit down to edit them all.
Total time spent: 1-2 hours.
Step 6: Editing the Photos
For just one blog post, I can end up with anywhere between 75-200 pictures. And from that, I have to wean it down to only 5-10.
So I sit my butt down and do the eye-doctor comparison dance. “Is A better? Or B?” “Okay. Is “B” better, or “C”?” “Okay. Which is better? “A” or “C?” “OMG JUST PICK ONE.”
After I’ve chosen the best photos from the bunch, I’ll edit them. Sometimes that just involves doing a little cleanup and adjusting the levels, so the color isn’t too off.
But sometimes I like to get fancy. (Okay, ALL the time I like to get fancy, dahling.) And the results end up like this (note: the first photo is completely unedited and on the yellow side):

(This is my favorite part.)
Total time spent: 30 minutes to 1 hour.
Step 7: Writing and Editing
When I first started my blog, I thought, “Oh, I can’t wait to write every day!” Well … sometimes this is the hardest part now. The writing. By the time I get to the writing part, I’m pretty pooped and my head is an overripe cantaloupe. But I make myself do it, only because I don’t want to forget anything. I want to write while I’m still in the moment of it all.
You guys know what I’m like. Verbose. Talky. Full of TMI. So this is a laborious process that takes …
Total time: 2-4 hours.
But when I hit publish, I’m washed with an overwhelming sense of accomplishment, which is soon taken over by dread, because I’m afraid you’ll hate it … or I’ve left in a typo.
Usually neither of those things happin.
TOTAL TIME SPENT ON A HOW-TO BLOG POST: 6 – 16 hours!
Show Your Favorite DIY Bloggers Some Love
It’s a fact that I’m not the only blogger who goes about the how-to posts this way. Almost every pictorial tutorial you see has most, if not all or more, of these elements attached to them. No matter who the blogger is.
It’s a labor of love, my friends. I’m certainly not writing this to complain or to ask for gratitude (personally). I do it because I love it. And I do it the way I do it because my dad always told me to “never do anything half-assed, Betty.” It stuck with me. A little too much, what with my overboard enthusiasm sometimes.
But most DIY bloggers (myself included) barely make enough money to pay for the supplies they amass to bring the world (and their own homes) their unique knowledge and personality.
We thrive on your support. Not monetary. That’s a bonus. We thrive on knowing that we’re sharing effectively and that someone, somewhere is listening and loving all our effort.
Like I said to begin with, you guys are THE BEST readers any blogger could ever hope for. I have ZERO concern about whether or not we (you and I) are in a helpful, happy relationship.
But next time you see a DIY tutorial on another blog, and you love it, be sure to leave a nice comment for the blogger who’s slaved away and spilled half her ingredients to bring you the information. She or he will appreciate it beyond measure.
And if they’re selling a book or a product, and you feel like you’ve gotten something from their blog, DO buy it! Even if it’s on a topic you don’t really need. That small amount of support could mean the next blog post is even better than before.
And now.
Now you may return to sanity.
BRB. Going to clean my kitchen.


 How Chickens Lead to a Better Life
I’m so thankful that I stumbled upon your site and this post! I’m new to blogging and I thought I was doing something wrong because of how long it takes me to create a tutorial post! Thank you for sharing, I’m greatly encouraged:)
Hi!
I am currently living in Beijing China and I stumbled across your blog soon after I arrived here. Most blog sites are blocked here and I continue to be glad that your blog site has been deemed appropriate to come through my Chinese internet cable. When I came across your blog a couple months ago I read about the no ‘poo and actually have not washed my hair with shampoo since the night I stepped off the plane. I continue to read your posts, but I often become a bit sad because I am in a country where I do not know the language or where to buy things like essential oils or many of the cool awesome things I want to try that you write about. Last week I was talking to my boyfriend about having an herb box in our apartment and tonight I saw your newer post about what to plant in an herb garden! Perfect! I will have to figure out how/where to buy some of those things. But anyway, I just wanted to thank you. Even though I currently can’t figure out how or where to buy many of the things you write about, it has really helped inspire me to get in to what an opportunity I do have with being in China with all of these herbalists and a different way of life. So keep it up! And I know you will continue to inspire me to take advantage of what I do have here and to be a little Chinese crunchy 🙂
Thanks for being so genuine and transparent when you write. The information you post is great, but the way you present it is what i enjoy the most! BTW, your home is so pretty.
I have so completely enjoyed my time on your site since I discovered it in November, that I bought your ebook just to give you some money. I don’t have oily skin or acne problems, but I really wanted to let you know monetarily how much I appreciate the time you put into the recipes you give us. What I value most about your blog above many others is that you really do the recipes yourself and try out different ways. Then, you tell us the truth of how the recipe will perform. (I’m thinking here about the homemade bubble bath recipe, and the homemade makeup post.)
I’ve been telling anyone who will listen to me that they should check out your site. You are a true gem!!! Thank you!
I have your book on my kindle. I am going to try to start reading it tomorrow!! I love your website and have gotten a lot of good ideas and tips from you and from your readers.
What a huge time commitment! Thanks for bringing us great recipes nd tips out of your own spare time. I appreciate it!
Thank you for putting so much work into your blog–the research and the testing. I really appreciate knowing that you’ve thought through things-and I love your insights and ideas! Keep up the good work.
thanks for posting about how you post! 🙂 I always wonder how other bloggers do it! I’m always lacking the natural lighting, since I often do projects and recipes when I get home from work. I’ve been wondering about how many people do backgrounds and surfaces too. great tip about the stovetop!! 🙂
http://munchtalk.blogspot.com/
I found your blog about 2 weeks ago while searching for crunchy fabric softener. Thanks for the soapnuts tip, they are FANTASTIC!!! I’ve been reading a lot of your posts, and trying so many of your wonderful suggestions with GREAT results. So thank you for all you do.
It seems like Mike and I always pick the more difficult things in life, like….DIY blogging! You hit the nail on the head 😉
It takes us at minimum 6 hrs to create a good how-to DIY post. We love it and that’s why we do it!
Amen, sister! You’re a gem… THANK YOU for all the effort you put in (I refer SO many people to your blog too, I LOVE LOVE LOVE it!)
Thank you so much for showing us this. I always appreciate DIY posts but now I can truly grasp what they mean and how much love and effort they require from the blogger. And I really do thank you for everything you’ve taught us to do through your labors of love. You make living a crunchy life much easier!
PS: I have your book high on my wish list, I just need a bank to let me have a card first 🙂
I love your blog and I count myself blessed to have been the receiver of amazing, helpful information from bloggers! Thank you for all that you do, for making things easy-to-follow, and for keeping things interesting…may you prosper in ALL wonderful ways, $$$ included! 🙂 PS: By the way: I have the same-type headboard. 🙂
I came upon your blog through pinterest and I am so glad I did! I made your all purpose spray cleaner and it is the best stuff I have ever used! Thank you so much! I am now a loyal reader!
hi Betty! Thanks so much for all the wonderful ideas you give me. I am making the bath candy hearts for Valentines day. Perfect timing!!!! from Betty (my real first name)
I think what makes your blog so special is the down-to-earth style in which you write. I’ve looked at a bazillion things online regarding diy recipes for body care and they all seem overwhelming. You, however, make it real and make it easy. Thanks for that! (sitting here with a hot oil treatment on my head) Also, all those comments are helpful to the readers as well because there are so many extra tips!
There is tons that goes into a DIY post, I know this and I don’t even make them lol. Plus I used your baking soda and vinegar on my kitchen sick and it looks fantastic! (I live with my grandparents and they like to pretend we have a garbage disposer when we don’t)
I love this post! Thank you for showing us your method of creating these wonderful posts! Your blog is my go to place for all things homemade. 🙂
Besides wanting to thank you for all the great ideas you have given me on your blog (I have used nearly a dozen, most with lovely results), I want to say I love your crunchy corner! My crunchy ingredient stash is getting large and disorderly. I have repurposed jelly jars all over my house and I have to get organized. I love the idea of having one area dedicated to all the crunchy beauty paraphernalia.
Your posts are fantastic, your pictures are great, love your recipes, but most of all…. your sense of humor. It’s great! Please, please, keep up the good work.
Wow, as someone just starting up a blog I’m having second thoughts after reading that. Haha! BUT, it’s also inspiring at the same time. In fact, you ARE my inspiration for starting a blog. It’s been fascinating to watch you and your blog grow since I found it a couple years ago – your photography, writing, the number of comments, the community, the e-book! I can’t remember how I found your blog but your writing hooked me right away and I’ve never left. I’m quiet, even on the internet, so I do have to consciously remind myself to comment. I appreciate the behind the scenes look! And everything else you do. Because of you, I make and use homemade deo, toothpaste (first visit in years I didn’t have a cavity actually), oil cleansing, honey wash, tried no ‘poo, and the list goes on. Now I’m going to try my hand at blogging…maybe.
I love your blog and wanted you to know how much you are appreciated! Thank you for your great posts!
I love your blog Crunchy Betty. You deserve 10x more than you’re making on this blog—like all artists, some people don’t know what they’re getting, and how freakin’ hard it is! Much love and DIY gratitude for you!
Words and dollars can’t express how much you bring to the world, Crunchy Betty. I found you when I was searching for support during a low point in my (now greater than one year long) no ‘poo experiment. I couldn’t believe my luck!! All of my thoughts gathered up in one concise (yet verbose hehe) website! Since then I have had that comforting feeling of knowing that love, advice and support is only ever a click away. You’re a true gem and we are lucky kids for having you here. I know you weren’t after compliments but now is as good a time as any to lay ’em down 🙂
Wow! Thanks for the shout-out & also for taking us through your process!! -heather
Wow! I had no idea how long it takes to make
a tutorial.Your awesome for helping out all of us Crunchy Bettie’s
with your knowledge and time.
Okay, one: thank you for this post and all of the others. Two: I adore your crunchy corner!
Three, this post has amazing timing; I’ve been grumpy all day, mostly with reason, and you smacked me in the face with the much-needed reminder that there is are at least two sides to everything.
Thank you!
Oh, I am pretty confident that the huge amount of time and effort that you just detailed above for us is only scratching the surface of what all goes into creating this wonderful place. (And I had to laugh out loud at the Death, Taxes, and Dirty Dishes line! So, so, so, so TRUE!)
I found your blog on New Year’s Day through my cousin’s Pintrest page, and immediately knew it was going to be a good year! Without trying to sound too stalker-y, you are my new internet best friend and if I could only read one blog it would be yours. Please understand that I have been experimenting with some of this stuff for 20+ years, and it is SO AWESOME to have so much research done, so many techniques tested, all right here in one place…it’s like finding my very own grimoire that someone made just for me. Not to mention the fact that your writing style makes us all feel like we are chillin’ in your kitchen with you, sharing some dark chocolate. Thank you. I’ll be buying your book as soon as my freaking tax return comes.
I truly believe there is a connection between dark chocolate and hard work. It is fueling the brain like no other food. It sure does for me. 🙂
I love your blog, my daughter loves your blog. You are very famous in her school – as much as Adele or Ke$ha or Pink!, she talks about you a lot, especially when she receive compliments on her hair, or shiny lips. The new generation is going to be so crunchy!
Thank you. 🙂
Inspiring!!
You are on to something there Natalie. Raw chocolate, especially, fuels the brain in interesting ways…Natalie, meet David Wolfe: the Naked Chocolate Chef 😉 Have you and your daughter ever tried soaking real organic cocoa beans in cold water for 15-30 minutes, and peeling them to taste what chocolate is fundamentally made from? Its a really special food. Maybe homemade organic raw chocolate is smth you want to try to make at home!
http://www.sacredchocolate.com/prescription-strength-chocolate-theobroma-cacao/
I really LOVED this… For me personally, when I”m reading a blog post, I ALWAYS leave a comment, because someone put time and energy into writing/sharing photos. So it’s the least I can do, on my end, to show my appreciation 🙂 🙂 Besides that, I’m so thankful for DIY tutorials, because I’m a visual learner, and having photos really helps me a lot 🙂 🙂 Love and hugs from the ocean shores of California, Heather 🙂
WOW… *newfound respect* Thanks, Crunchy Betty! I feel ashamed for all of my morning when I checked CB and was disappointed that you don’t blog every frickin’ day!
OH ME TOO!!!! I will not be disappointed anymore now that I know!
Hi Crunchy Betty, your timing on this post is quite ironic as just earlier this week when i received your latest labor of love into my inbox i had the exact thought – how grateful i was for all the effort you put into the knowledge that you are blessing all your followers with – and i knew it was far more effort than myself or others likely even realize. I want to thank you for all your tim,effort and knowledge that you graciously share with all of us, I am always excited to open my inbox to see what new information or do DIY natural remedy I will learn about on a given day. I love to come home after a long day of work and sit down to a cup of tea while I read my favorite new posts from bloggers such as yourself, its a gift you are sharing with us, and for that, I am very thankful. 🙂 Please keep up your outstanding work and please know you are so appreciated by your followers. You are truly an inspiration Crunchy Betty!!
Sincerely, Susan from Ontario, Canada
Hey I love you and your blog, found you when I was looking for homemade deodorant, and then kept on reading! Way to go! I have done a handful of DIY posts, and amen to this!! Mine are never near as nice looking as yours!
Vicki
This blog post had me laughing and nodding along! I am not a blogger. However, I have been teaching DIY classes and writing DIY articles and working with friends and acquaintances in this realm. I love making things myself! I love the work, like you do. I wanted to be a photographer at one point growing up, which makes me laugh now. I take thousands of pictures and haven’t been paid for one. LOL
A friend actually told me she would rather I just make the product for her than for her to come to class and learn to make it herself. Okay. I consulted her regarding her particular needs and made it for her, at her request, and let her know it was ready and the price. It is still sitting here over a month later. I created a custom product just for her, but my time and research skills and experience have very little value. Hmmm…
On a brighter note, I have been working with other folks who DO appreciate the custom nature of my products and classes and it is SO MUCH FUN!!! I just finished the final details on my first batch of perineal massage oil for a doula friend of mine. I am so excited to give these to her…hours of research, weeks of infusing, product labeling and naming, writing a short article to accompany the bottles, etc…all worth it when her tone of voice was as excited as mine!
Feedback is everything. <3
I too just found you recently via Pinterest and I’m so glad I did! Can’t wait to try your deodorant and I’m buying your ebook because I already put food on my face and want to do more!!!! I can relate to everything you said here and loved reading the post you linked too about why people hate when bloggers make money! I am a food blogger and like a DIY it’s a LOT of work! The research, conceptualizing a new recipe, the LISTS, laying awake a night when a new idea hits and I start obsessing about it, the shopping, cooking, styling, photography, photo editing and then the writing – if I didn’t love it so much I’d never do it! I monetized early on and frankly it’s a joke as others have mentioned – I make less than $40 per month which doesn’t even cover my gas for grocery store trips, let alone anything else! And while nobody complains about my ads, I get comments and random emails that can be downright rude and with an expectation that I am like their free personal chef who exists only to provide them with nutrition info (I’m not a diet blog people!) or help them figure out why their green smoothie was purple (because you put BLUEBERRIES in it moron!!!!). But enough about me and my (many) issues!! 🙂 Just wanted you to know I love your blog and it’s content and truly appreciate all of the hard work that goes into it! So THANK YOU and please keep the awesomeness coming!!!!
I love your blog. I happened upon it during a google search one day, and liked your writing style so much I added it to my google reader. I especially love that you’re supportive of raw milk. 🙂
Maybe this question has been answered before, but why don’t you monetize your blog? I’ll stick around if you do. 🙂
Thank you for all your hard work that goes into these posts! I love reading your blog. I’m fairly new to all things crunchy, but you make learning about them a delight. Looking forward to more great how-to posts. 🙂
I am so happy I found your blog (thanks Facebook!), love it! This post hits the nail on the head, although I am a bit of a slacker by comparison 🙂
Keep it up, your posts are awesome!
I want to start by saying that I do not begrudge ANYONE who wants to make money doing what they love. My mom’s side of the family are all natural business-people, including and especially my mom, and they all have been able to support themselves at one time or another by following up on an idea they had about something they were good at.
However, living in a self-employed family has given me a unique perspective on how hard you have to work to run your own business and how long it takes to actually start making money at it. Whenever I make a batch of soap or knit a scarf or WHATEVER and I get the “I could sell this!” bug (and I get it often, in spite of myself. It’s in my genes! It’s a curse!) I step back and think of all that’s involved and decide to keep it in the hobby phase for a little longer, until I get better and more efficient at it.
So the point of all this is, Betty, even though a blog is not exactly a business, it’s obvious that you work hard at it. Considering that the only reason that I stumbled on this blog to begin with is that I was looking online for natural ways to control my acne (and then discovered all of the other amazingness on here– I made wool dryer balls the other day!) I’m perfectly willing to pay $6 for your e-book, and I did, and I think it may be working! And even though I buy most of my supplies from an awesome local business (plug for Wholesale Supplies Plus!) if I ever need to buy something from mountain rose herbs, I’ll do it through an affiliate link on this site.
Don’t stress, we love you. You’re awesome.
Thanks CB for this post. You practically took the words right out of my mouth. I am a blogger myself and can attest to the fact that one simple comment or email can make or break you. Right now I am trying to increase my readership and participation on my site, when you don’t get any feedback it can feel like you’re posting things for no one which gets disheartening real fast!
PS: I still love my Crunchy Betty Bracelet! I sport it proudly around town, and anytime I’m whipping up a crunchy recipe. Maybe it will help me channel some of your greatness 🙂
I will never impatiently grumble to myself again while waiting for a blog post from any of the blogs I follow. I had no idea it took this much work! Thank you for the perspective, Betty.
On a side note, I totally appreciate and love everything you do! And I’m very jealous of your “Crunchy Corner”. One day… one day… 🙂
I laughed out loud so many times my stomach is hurting….. thank you so much for this! One of my favorite posts ever. I am a brand new blogger, but can already relate to so much of what you wrote about here. Good stuff. Thank you and keep it up! You are awesome! I already have links to your blog on mine, and plan to have more because you have sooo many great recipes, etc. and why would I need to re-create the wheel, when all I need to do is link to my readers to your genius recipes?!! And of course you are given full credit with each mention!! no worries there. You are one of my most favorite blogs in the uni. thanks!! Please tweet the “cleaning the kitchen” thing so I can retweet you! brilliant!
I love your blog!!! I am so glad I also came here accidently just as Vert_37. I have learned so much and you always offer a lot of good information. Thank you so much for your hard work and dedication!!!
Betty,
Your blog is the greatest. I love your writing style. Your writing “voice” is just so conversational. You write in a way that makes me feel like you’re chatting with me. Not “instructing” me. Like we’re a couple of pals just sitting around, eating chocoloate, drinking wine and working up a few projects. Having some great laughs while we spill stuff and it dribbles on the floor.
Thank you so much for your work. Wait…scratch that. Thank you so much for your labor of love. For us. You do it for us. And we appreciate it. Thanks.
This post was amazing! thank you SO much for detailing all that goes into the many blogs I enjoy. Yes, I do have a newfound appreciation for all your, and other bloggers’, hard work.
This is wonderful! I just started blogging this weekend, actually, so you’ve confirmed some of what I already know and enlightened me to what I didn’t. Love the DIY bloggers – thanks for posting!
Thank you! The time you put in really shows I LOVE your posts!
THANK YOU SOOOOOO MUCH!!!! You are the greatest DYI blogger! I loooooove all the wonderful stuff you give us. And that line about death, taxes, and cleaning the kitchen? HAHAHA! That is THE best! I’m going to use that all the time! I must spent 42 hours a day cleaning the kitchen, and WHY is it that the more we’re away from home, the messier the kitchen gets?
Thank you! Thank you! Thank you! For all you do, all you share, and who you are. I’ve gotten so many useful ideas and recipes here. You are amazing. And so are your countertops. I’m very jealous of your kitchen counters.
Thank you yet again for the blog!
I do appreciate all that you do. This information is so much needed these days.
And you give me a good lough now and then.
Betty, you are so much fun!
We love you!
Ha! ♥ed it! I love that you are “real” and your writing is “real” and your bajillion photos are “real” and your kitchen after a project is “real”. You go girl! Love your site….. It’s my favorite!
I, for one (and many, many more I am sure!) ADORE your posts, your inspiration, your yummy love flowing like honey to all us lucky ones!! If I were there, I would clean your kitchen!! (between hugs, giggles, and chocolate of course!!) xoxo Kelly
Haha. You’d better be careful. There are definite days where I feel compelled to ask for donations to fly someone out here to clean my kitchen for me.
Thank you for writing this post! Ohemgee, I can so relate. Sometimes a DIY post feels like a major Hollywood production. Rest assured that your Crunchy Community appreciate your time, effort and verbos-ity:)
YES. A major Hollywood production that you’re doing ALL. BY. YOURSELF. No grips, no assistant producers, no lighting specialists. Just you and your quiet, accompanied by the click of a camera and the noise of dropping things on the floor. I really, really hoped this would help other DIY bloggers see that they’re not alone in the crazy. You are not alone. Although you’re probably not as crazy as I am.
Haha, I just went through this entire process last night making a homemade deodorant that I will be posting about in the near future. Thanks for showing this to the world and encouraging fellow bloggers.
Oooh. When you get your post up, I would love to see it!
Thank you dearie! I am so grateful that I came by this blog by “accident” (I was looking up recipes for making my own soap, lotion, etc. and just happened upon your site). Believe it or not, you are closer to a professional photographer than you would think- you didn’t spend thousands on your equipment but it gets the job done and done well. {(^o^)} I like your style of writing, TMI included- because sometimes we need to know even if we can’t/ don’t want to process it all just yet. I am gaining the confidence required to be my crunchiest self from reading your posts, (even though my slightly-crunchy mom doesn’t understand why I don’t use shampoo anymore). I’m not entirely sure why it takes so much courage, but I believe it has something to do with going across the grain instead of with it- suddenly I’m not doing what so many others expect of me, but what feels right (and it’s a little scary at times). Keep doing what you do. We Love you for it! You are an Awesome role model and a Beautiful soul. ; )
Sarah
Awww. Thank you. I almost feel bad about everyone saying such nice things. This post wasn’t to get sympathy or compliments – it was just sharing. But I won’t lie, it’s SO nice to hear complimentary words – AND ESPECIALLY to know that what I’m doing is helping other people along their journey.
It is so scary sometimes to “go against the grain,” but once you’re comfortable with your own choices, it gets easier and easier. Sometimes you make mistakes, and sometimes you go through a period of time where you believe something that just doesn’t make sense after a while, but ALL of life is a process of learning and defining. The fun is in getting dirty!
You rock. 🙂
“It is so scary sometimes to “go against the grain,” but once you’re comfortable with your own choices, it gets easier and easier. ”
And then you get to that point where you actually thrive on it 😉
Thank you!!! You are also a great inspiration! ; )
This post was a great segue to share how much you are appreciated and admired for your gutsy, lovely, crunchy self! {(^o^)}
I hope you never have reason to doubt that you are appreciated. As for financial support, I purchased your book and I try to use your affiliate links whenever I’m going to order from places you recommend (like Mountain Rose Herbs) so I hope that helps. You have helped open my eyes to all the chemicals I didn’t even realize I was exposing myself to every day and also how much more enjoyable it is to use something that you’ve made yourself (both from the sense of accomplishment and from the confidence that comes from knowing every single ingredient that’s in it)
So HUGS to you!! You rock and you have a loyal fan in me!
You should do a DIY post about putting together a Crunchy Corner!
Or if you did already, I will need to peruse and find it. I just discovered your blog yesterday (while I was at work…working, working very hard) and I love it. It’s the best “crunchy” blog I’ve come across, and I appreciate that you put so much time and effort into it. It shows.
Yesterday I rubbed a slice of potato on my face… that happened, and it was awesome. Thank you.
The potato rubbing, for some reason, was way weirder to me than putting a fruit mask on my face. I totally get you.
As far as the crunchy corner goes, it was born out of my initial shopping spree when I first started my blog … and then kept adding to those first products. Now I have, like, a hundred different herbs in those drawers, butters, oils, essential oils and so many other odds and ends.
The best place to start is here: http://crunchybetty.com/7-important-natural-skincare-ingredients-that-you-probably-dont-have-but-might-want
Great blog and I am not saying so, just because you said I should. It is good to know there are folks blogging because the do love the process of blogging. Blessings!
But sometimes I like to get fancy. (Okay, ALL the time I like to get fancy, dahling.)
Loved that comment! Reminds me of sequins Mondays. Yes, we are meeting for coffee but what I meet destiny on the way? If I meet with destiny, I’m doing so in a sequin dress!
I recognized every single thing you wrote. Thanks for saying it. And showing it.
:)PS. On another point: is Crunchy Betty blocking all comments with links now? I left a comment on your bath candy post with links but it never made it through the ‘this post has to be approved by the moderator’…?
Not blocking links, per se. I’m manually approving all comments with links in them, after an extended run of people posting their own affiliate links and spam links on older posts. It’s pretty time consuming, and I try to catch everything, but sometimes I don’t notice a “pending” comment for a couple of days. Sorry!
understandable. thanks for explaining! 🙂
I rarely comment but I couldn’t let this one get by without having you know that I read it. This is one of my favourite blogs, just so you know. 🙂
i am not surprised that so much work goes into each of your posts– they are clearly crafted with a lot of attention to detail, contagious enthusiasm for the topic/project, and they pack so much information! i love them, and i’m always excited to read a new post. also, i love the staging and editing that you do for your spiffy results photos. 🙂
Yay! I get to be the first to say how much I appreciate your wonderful blog! For the past year I’ve jokingly called my bathroom cabinet the pantry, so I was very, very excited when I found your site this week. I’ve never purchased an e-book from a blogger before, but after scanning through all the awesome free recipes you put up for the Christmas present I decided I HAD to buy food on your face, even if our budget is crazy tight. And I love it! I’ve now had (more) food on my face for the past 3 days, just rubbed it on after eating, but dang, I just ate an apple and forget my food facial. Drat.
That cracks me up – the kitchen/bathroom have become one!
Last week, my brother walks into the kitchen, and I’m standing there with a tub of natural yoghurt and a jar of honey (one of my favourite snacks). He says “oh are you about to have a shower, I just need to brush my teeth before I go to work”. Hilarious!! He is so used to food in the bathroom that he thinks food in the kitchen means I’m on my way to the bathroom 😛