Over the next two months, I plan on posting several gifting ideas – so we can all get ready for … dum dum dum … the holidays.
This year, I took the handmade pledge for Christmas gifts (only buying or making gifts I give), and this is one I would do for someone I love in a heartbeat. Check it out.
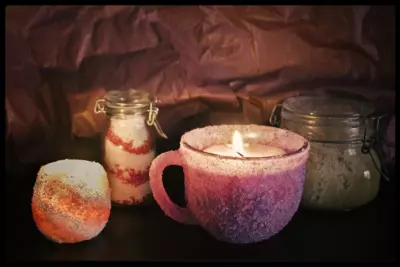
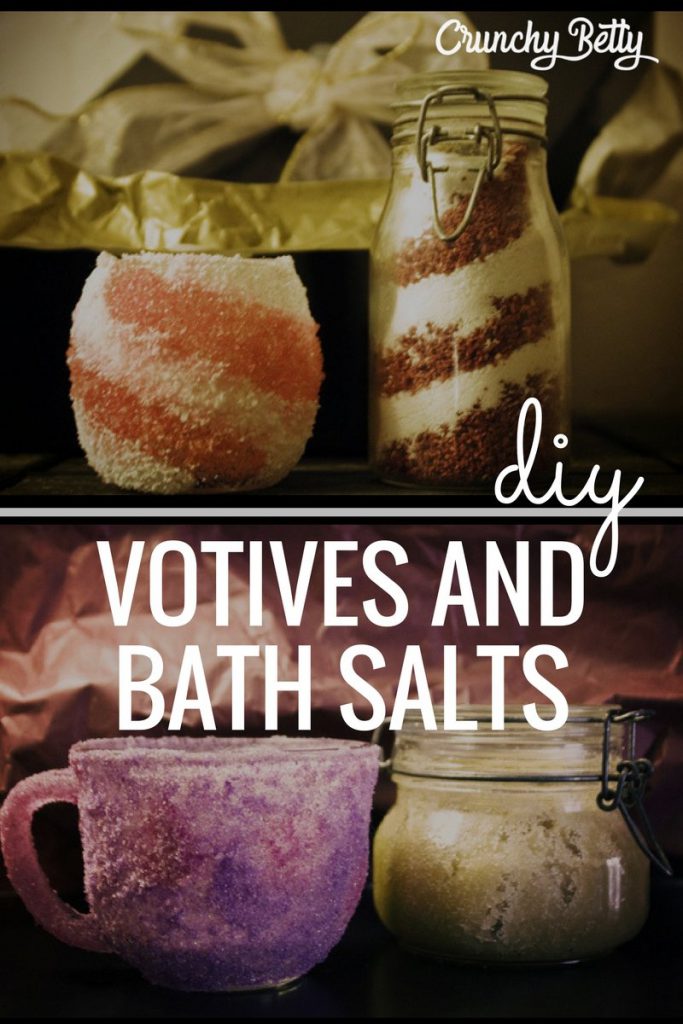
They’re “candle holders” (only one is really a candle holder, the other is a glass mug from Dollar Tree, which means it cost a whole … dollar) covered in colored epsom salt or sugar, with matching appropriate aromatherapeutic bath salts or sugar scrub.
This excellent idea was sparked by this blog post, although her epsom salts look MUCH different than mine (hers look more like real salt, mine look like snow). While I liked the epsom salt look, I also thought it would be fun to do one with sugar (to go with a matching sugar scrub). It turns out, I think I like the sugar even better than the epsom salts.
Here’s how to do it. All.
How to Make Sugared or Salted Glass Candle Holders
As are most of the crafty things I do, this is a cinch.
You only need a few things:
- Glass jars/votive candle holders/random pretty glass containers
- Epsom salts or sugar
- Modge Podge
- Plant-based food coloring (which you can find in your local natural foods store)
- A paint brush
- Clear glass sealant (optional)

If, for some reason, you can’t find natural plant-based food coloring, you can use regular food coloring – only not in the scrubs and salts intended for use on the body. Dig?
I happened to have some regular food coloring – and one red plant-based one – so I used my pretty purples, pinks, and greens for the outside of the candle holders, and the red for the salt bath (recipe below).
Step 1: Prepare Your Sugar or Salt
Measure out about 1 cup of epsom salt or sugar (using more or less depending on the number of glasses you want to coat).
Then, in a small bowl, mix together a couple of drops of food coloring with your salt (or sugar) and stir together, mushing with the back of a spoon to fully incorporate. Add more if you want a darker color.
After that, spread out the salt (or sugar) onto a plate and get ready for step 2.

Step 2: Coating Your Glass
Over a piece of newspaper (or your sink) paint the living daylights over the outside of your glass container with Modge Podge.
I mean coat it, people.
The thicker the coating of Modge Podge, the easier it is to get the salts/sugar to stick to the glass.
Working quickly (so the Modge Podge doesn’t dry), roll your glass over the salts/sugar on the plate. Eventually, I preferred to just pick up scoops of the salt and pour them over the top, patting down lightly to get all of the salts/sugar to stick to the outside of the container in an even layer.

After your glass is thoroughly coated, set it somewhere to dry and leave it alone for at least an hour or two.
If you’re giving this away as a gift, I do recommend coating it with a clear glass sealant (as this blog post recommends), because the salts do like to flake off a bit. However, if you’re just going to do this for fun at home and won’t be touching it very often, this step isn’t a necessity.
SEA SALT DOES NOT WORK. Just FYI. I thought my gorgeous coarse sea salt would be better than sugar and epsom salts, even, but it appears that Modge Podge melts sea salt in a weird chain-reactiony way. After a while, I just had a big pool of colored, slimy sea salt sliding down the glass jar on the counter.
But back to the successful part. Here are more pics. I love these things (I made 7 of these yesterday). Gah.

The green one up there is with epsom salt. The one that looks orange is sugar (and the one behind it is epsom salt, too).
What I love about the epsom salts: They look like fluffy snow. My plan this Christmas is to do a line of these alternating in red and white across the divider between my kitchen and living room.
(PS – The votive candle holders? I got them at Hobby Lobby a while back when they were having a 50% off glass sale. They were 50 cents each.)

The mug is my absolute favorite. It’s all sugar, and I did two separate colors – pink and purple. It looks like frosted stained glass. For a moment, I was worried about the sugar melting, but I burned that candle in the mug holder for 5 hours last night and it didn’t melt or get soft at all.
Score.
Creating Your Genius Matching Gift Set
I’m going to give you the recipes for the things I created, but please feel free to come up with your own scent combinations and ideas.
The fun is in customizing!

Candy Cane Bath Salts (With a Candy Cane Luminary)
- 1 c. Epsom salts, divided in half
- 5-9 drops of plant-based red food coloring (more or less, depending on how red you want your candy cane)
- 10-20 drops peppermint essential oil
Measure out the epsom salts in two small bowls. In one of the bowls, drop in your food coloring and mix and mush it around until you have an even red color. Then, drop in your peppermint essential oil – equal amounts into both bowls of epsom salts.
Starting with red, pour in a small amount of epsom salts (tilting your container, so you get a “stripey” look) and then pour in an equal amount of white epsom salts. Continue layering until your container is full.

There’s a better look at the candy cane luminary, all lit up. It’s actually BOTH epsom salts (the white stripes) and sugar (the red stripes). It’s like snow and candy together. Magical.

Lavender Vanilla Sugar Scrub (and the Matching Sugared Mug Candle Holder)
- 2 c. raw, organic sugar (or just plain sugar)
- 3/4 c. sweet almond oil, grapeseed oil, EVOO, or other carrier oil
- 20 drops lavender essential oil
- 10 drops vanilla essential oil
In a bowl, combine all ingredients well. Add more oil if you’d like (this recipe isn’t particularly oily, which is how I like my sugar scrubs). Scoop into your container, label, and give to someone you love (or keep it for yourself, gosh darnit).
Do You Have Any Good Crunchy Gift Ideas?
I’m on the lookout, crunchy beauties, for more gifting ideas to blog about.
Do you have any unique, fun (and relatively easy, because I am not blessed in the technical crafty areas) gifts I could feature here on Crunchy Betty? Share them! (And, if by chance you’d like to blog it yourself, I’m definitely open to some crafty guest posters).
Share what you know.
And tell me what you think of these!

 Community Question: Shaving Cream and Manly Resistance
Has anyone here tried the lip balms?
This is really cool! I’m only gonna try the second two recipes ’cause i spent a hour trying to find where they sell modge podge
Please excuse me if this is a bit of a dopey question but in my experience sugar + heat (or moisture in a bathroom) = melt = ants/other miscellaneous bugs;
I know you said you didn’t experience any melting with 5hrs burning but it seems like a clear sealant should be essential with sugar because of the potential bug problem; I sure don’t leave my sugar bowl uncovered!
Absolutely love and appreciate your experiments with different textures. I’m totally going to link to this post, I want to make sure I add it to my to-try list!
Wish I’d made these in girl scouts as a youngster rather than those ugly sand candles! They’re way cooler 🙂
Wow.You made a equation out the things that happen.And yes,sand candles are very,very,very ugly.
Hey – LOVE these ideas!
Quick question though… what is Hodge Podge & where would I find it??
Thank you for such an awesome craft idea… time to get shopping!
Also, I’m a candle-maker from way back. It’d be a fantastic idea to do any of these & make your own scented wax and pour into your ready-made votives! Candle-making is easy so long as youve got a few basics 🙂
What a fun gift idea! I love it.
This is such a great idea, thanks for sharing. I’m so going to try this and will share with my readers.
I’m definitely making sets for at least some of my roommates! And I think I’ll salt a jar then put a soap pump in the lid. Gotta love a frosted bathroom!
These look fantastic! I’m thinking about making a set for myself first (I have to try it out, of course!) and then possibly making some for my mom, sister, and roommates…this should be fun!
Lovely gift ideas! 🙂
The timing is perfect…went to the mall today to score presents for the picky teenagers during this weekends “fall sale” but am still looking for some homemadeables for some crunchy friends.
I love the Vanilla Sugar Scrub! I wonder how long it will keep? Maybe a teaspoon of Vitamin E mixed in would preserve the shelf life? Thank you for these awesome gift ideas!
My fav is the lavender gift set. Just beautiful. Personally I plan to attach an ingredient card using business card stock, punch a hole in the upper left corner of the card, and tie or stick it to the sugar scrub container. Paint or paper a box or a great find from a thrift store. Use some filler paper (even construction or newspaper) can be made using your shredder. From a thrift shop pick up some extra spoons to tie to the sugar scrub container or even use small wooden scoops off of ebay or your health food store. A cd of nice easy listening music would also add a nice touch. These you made Lesie are functional, yet elegant. Thank you. I love it!
Thanks for sharing this great gift idea. They’re beautiful. Some lucky people on my gift list will be sure to love these sets. I can’t wait to put some together.
Good idea with the shredder. I’ll take some newspaper and shred it at work.
Also good as wrapping paper, give a three year old free reign with a paint set. Especially for grandparents’ gifts.
I’m making the candy cane salts, with peppermint for the red and lavender for the white salts. Mmm if they make it out of my house as a gift, it’ll be a miracle. Oh! And a coordinating striped sugar scrub… I wonder if that’ll work… My house is seriously never getting cleaned again until January at least. 🙂
Thanks for the shout out, so glad you enjoyed the project! I love the candy cane striped one, what a great idea. I had those more “snow” looking salts too but wasn’t sure how well they would work. So I opted to use the others instead 🙂 Nice job!